Icinga 2, Icinga Director and Notifications
Time Periods
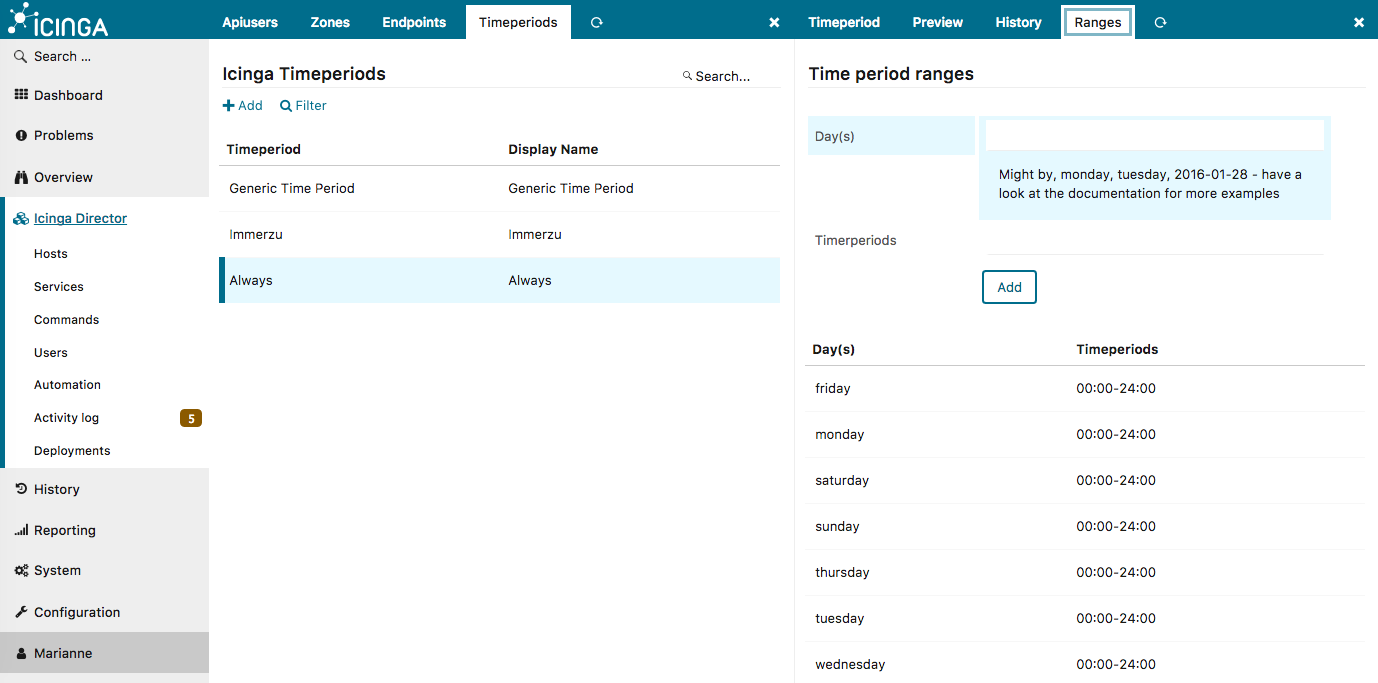 Your first step should always be a fresh git clone. Are you ready? Start by creating your first „timeperiod template“ – Generic Time Period. Then you’re able to create your first „timeperiod object“, let’s call it „Always“. Define your time ranges – in my example every hour on every day.
User
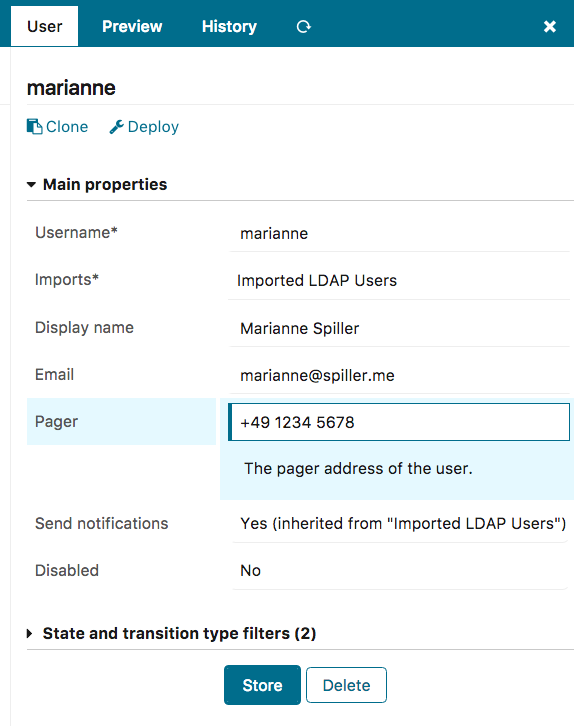 Notifications always need a user which receives them. So, as a subject to a user template – „Imported LDAP Users“ in my example – we can now create our first user object called marianne, that’s me ;) The pager number is not important, as we will setup email notifications. Be sure you set
 Send notifications to Yes in your user template.
Scripting
The icinga2 package ships the good old mail-host-notification.sh and mail-service-notification.sh. Unfortunately, they are not usable in Icinga Director as there’s no ENV support. But that’s pretty okay, even without – I wrote two ugly little scripts you may use if you’re interested in:
$ cd /etc/icinga2/scripts
$ wget https://raw.githubusercontent.com/netzwerkgoettin/misc/master/icinga2/scripts/host-by-mail.sh
$ wget https://raw.githubusercontent.com/netzwerkgoettin/misc/master/icinga2/scripts/service-by-mail.sh
$ chmod +x *by-mail.sh
Notification Plugin Command
These two commands Host Alarm By Email and Service Alarm By Email need to be created within the Director. They are objects of type Notification Plugin Command and use the full path to the particular script as a command.
object NotificationCommand "Service Alarm By Email" {
  import "plugin-notification-command"
  command = [ "/etc/icinga2/scripts/service-by-mail.sh" ]
  arguments += {
    "-4" = {
      required = true
      value = "$address$"
    }
    "-6" = "$address6$"
    "-b" = "$notification.author$"
    "-c" = "$notification.comment$"
    "-d" = {
      required = true
      value = "$icinga.long_date_time$"
    }
    "-e" = {
      required = true
      value = "$service.name$"
    }
    "-f" = "$notification_from$"
    "-i" = "$icingaweb2url$"
    "-l" = {
      required = true
      value = "$host.name$"
    }
    "-n" = {
      required = true
      value = "$host.display_name$"
    }
    "-o" = {
      required = true
      value = "$service.output$"
    }
    "-r" = {
      required = true
      value = "$user.email$"
    }
    "-s" = {
      required = true
      value = "$service.state$"
    }
    "-t" = "$notification.type$"
    "-u" = {
      required = true
      value = "$service.display_name$"
    }
    "-v" = "$notification_logtosyslog$"
  }
}
object NotificationCommand "Host Alarm By Email" {
  import "plugin-notification-command"
  command = [ "/etc/icinga2/scripts/host-by-mail.sh" ]
  arguments += {
    "-4" = {
      required = true
      value = "$address$"
    }
    "-6" = "$address6$"
    "-b" = "$notification.author$"
    "-c" = "$notification.comment$"
    "-d" = {
      required = true
      value = "$icinga.long_date_time$"
    }
    "-f" = "$notification_from$"
    "-i" = "$icingaweb2url$"
    "-l" = {
      required = true
      value = "$host.name$"
    }
    "-n" = {
      required = true
      value = "$host.display_name$"
    }
    "-o" = {
      required = true
      value = "$host.output$"
    }
    "-r" = {
      required = true
      value = "$user.email$"
    }
    "-s" = {
      required = true
      value = "$host.state$"
    }
    "-t" = {
      required = true
      value = "$notification.type$"
    }
    "-v" = "$notification_logtosyslog$"
  }
}
As arguments, you’ll take the parameters used in the script – their values belong to the icinga runtime macros. The switch -4 means the IPv4 address of the host, and the corresponding runtime macro is $address$. Just have a look at the docs, read and learn – your possibilities will be nearly endless.
There was an error when determining the parameters – »Trying to get invalid property “argument_name”«. But this bug report is meanwhile resolved.
Notification Object
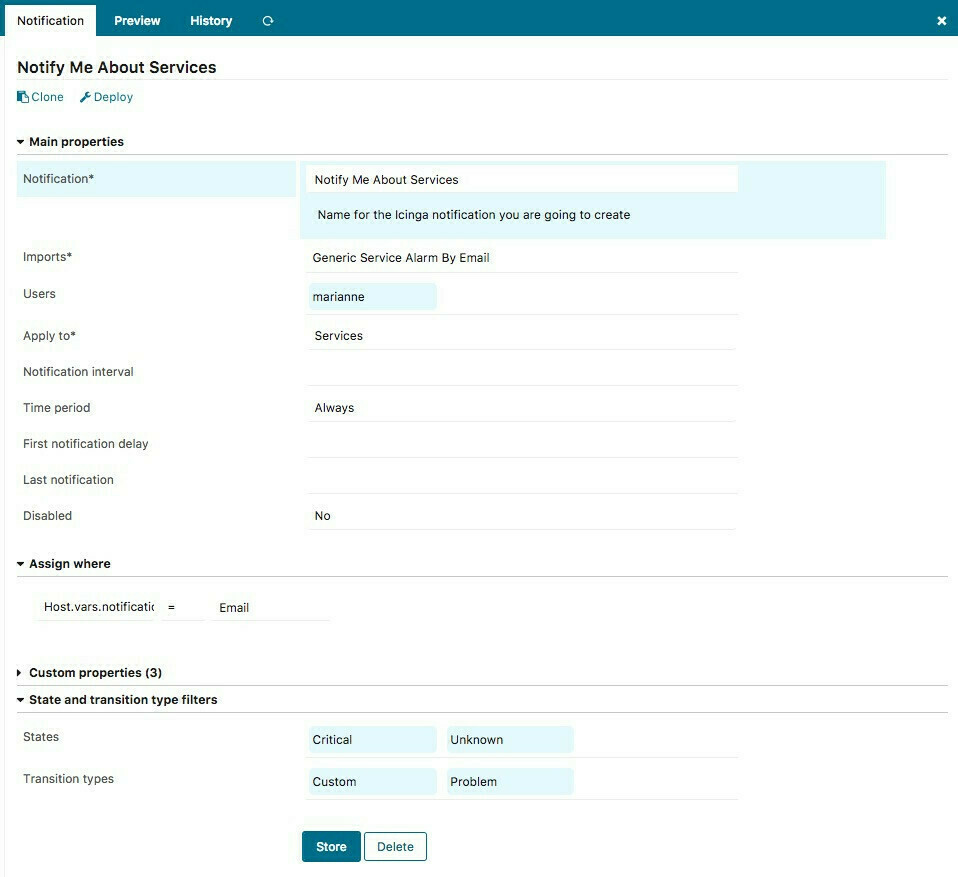 At last you’ll create your notification objects. First create – as always, by the way – notification templates and then let your notification objects import them. Define your timeperiod, if you want to, and don’t forget to fill in the mandatory field „Apply to“.
You even can define „States“ and „Transition types“ in your templates. But as it seems, notification objects don’t inherit these statements. At least I had to define them within my notification objects too. If I recall correctly, I already opened a bug report, but with Icinga’s move from Redmine to GitHub, I lost my view on that. Later on…
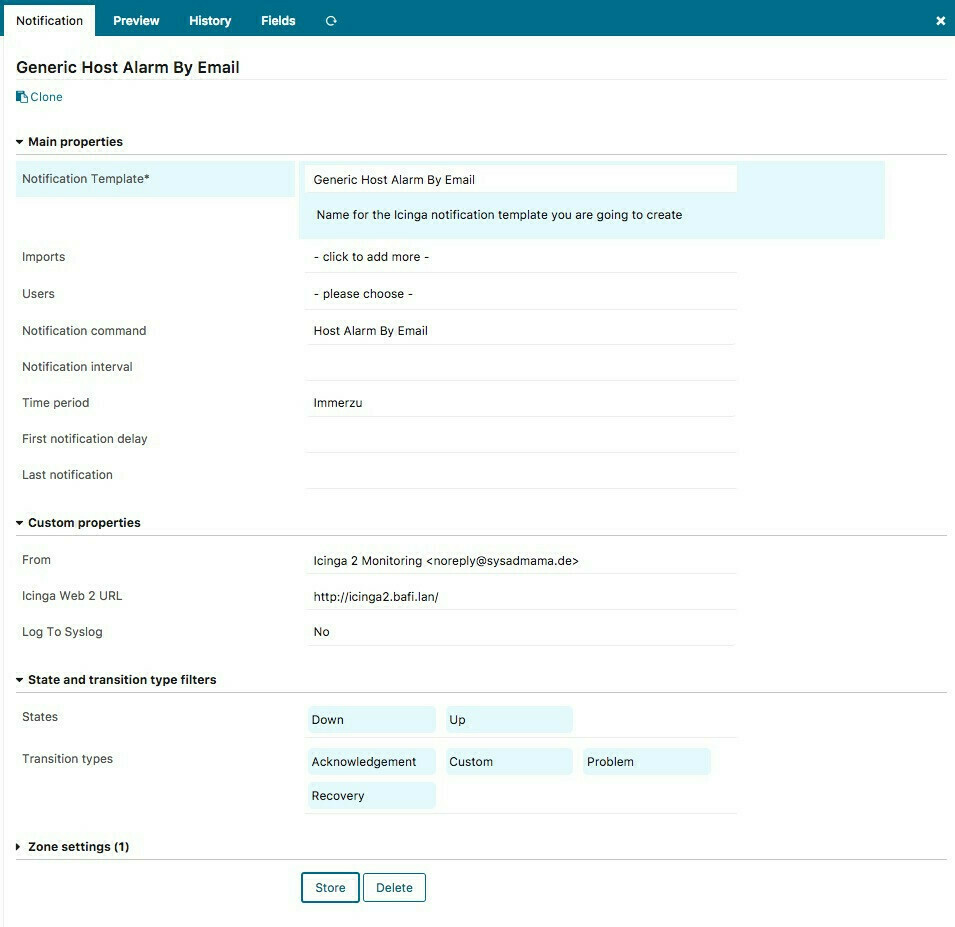 Store your notifications, and you’ll be able to assign them the way you want. Define data fields for
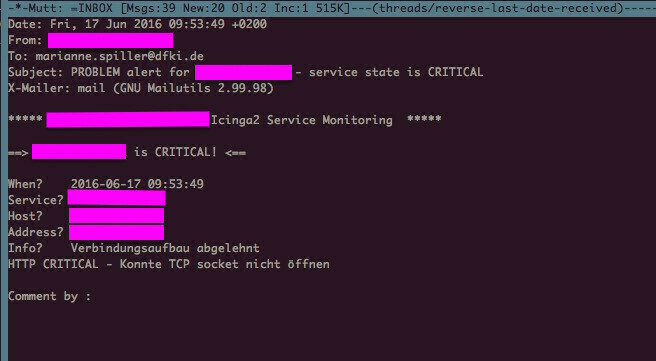
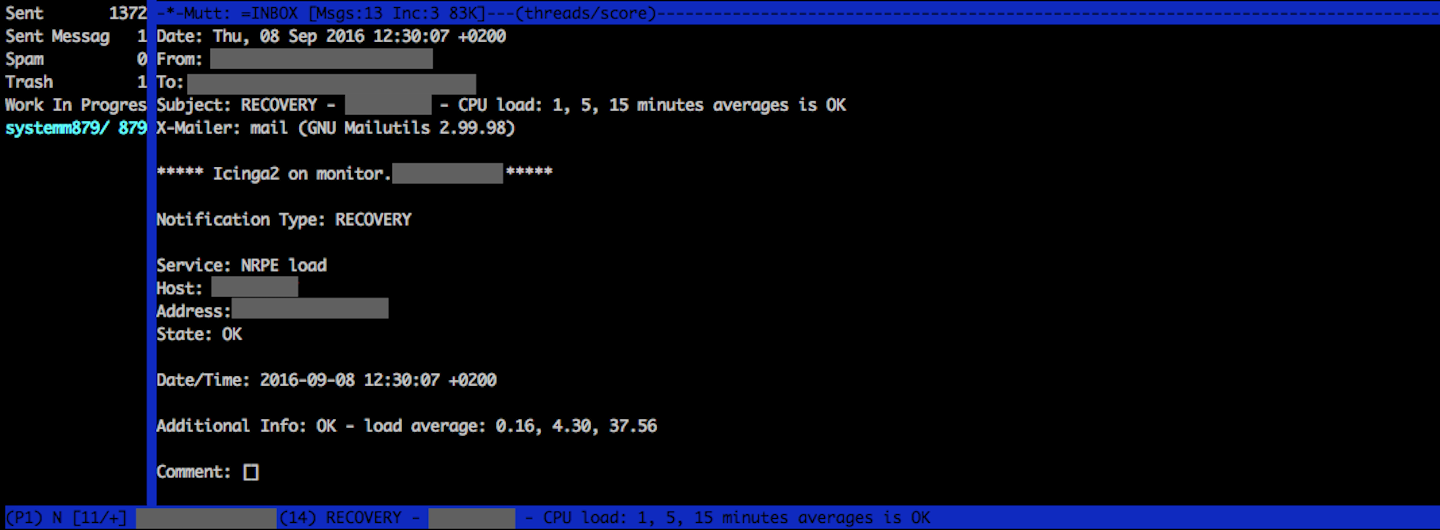
 $icingaweb2url$, $notification_from$, $notification_logtosyslog$ and assign them to your notification templates – and the scripts will use them. So you’ll get a nice From: header in your messages and a direct link to your sick host or service when using Icinga Web 2. When $notification_logtosyslog$ is set to true, the script use the logger command to append some debug output to syslog. It is not really needed – but in some cases, it is really nice.
Conclusion
 It was not that easy for me to figure this out… But now, it really makes sense ;) Just try it, just test it – and give me some feedback, I’m always happy for. If you’re running in serious problems, it’s better to use the GitHub project’s issues
 or Ex monitoring-portal.org as these guys can answer much faster than me.
Hintergrundbild: Bild genauer anschauen – © Marianne Spiller – Alle Rechte vorbehalten